Monday, September 6, 2010

How to Frost a Cupcake with a Piping Tip


I absolutely love frosting.  All kinds of frosting.  In fact, to me, cupcakes are merely a frosting delivery service.  The more frosting on a cupcake the better in my opinion.  The question I probably get asked the most is,  "How do you get the frosting swirl on your cupcakes and what type of decorating tip do you use?"  It's no big secret.  My favorite piping tip is an Ateco #885.  

Ateco 885 Tip
It's a very large tip that I discovered at NY Cake and Decorating Distributors in New York City.  If you are in NYC and love cake decorating and baking supply stores this is a must stop.  This tip uses a large amount of frosting and gives your cupcakes a beautiful swirl.

Wilton M1 Tip

I also use the Wilton M1 tip.  It's a smaller tip but still gives a nice swirl and a lot of cupcake bakers use this tip.  It's available at most Michael's Craft Stores or any store that carries Wilton cake decorating supplies and tips.  It's also a part of the Wilton Cupcake Decorating Kit available at Walmart.

I always use a 16" decorating bag and large coupler with my tips when I frost cupcakes.  If you have never used a decorating bag don't be afraid to take the leap.  You can handle a lot of frosting in a decorating bag and won't have to continually refill the bag as you frost your cupcakes.  Here's a great little video to show you all you need to know about the various types of piping bags.


I was going to make a little video showing you how I do my frosting swirls but You Tube and the internet is full of videos showing all you need to know.  Jamie over at My Baking Addiction was kind enough to share the following video.


 Cupcake Piping How-To from My Baking Addiction on Vimeo.

Here are two more videos showing how to pipe cupcakes.  One with the M1 tip and the other showing four styles used in England to frost cupcakes.  There are plenty more videos on You Tube if you still want to see more demonstrations.  The best way to learn is by doing.  So grab yourself a piping bag and your favorite decorating tip and start practicing.


Enjoy your frosting!

Enhanced by Zemanta

Lemon Ricotta Cupcakes with Raspberry Buttercream


As you may have figured out by now I love anything citrus.  Lemon is absolutely one of my most favorite flavors.  Pair it with raspberries and it's a sure winner.  I found this recipe surfing the web over on the Created by Diane blog.  Lemon, ricotta and raspberries...I knew I had to make these little beauties.  The cupcakes smelled divine while baking.  They are very dense and almost like a biscuit/muffin.  I tasted one right out of the oven and thought these need jam on them.  The raspberry buttercream adds that almost jam like flavor.  The combination of the cupcake and buttercream makes for a winner.


Lemon Ricotta Cupcakes
Created By Diane
Makes 24 cupcakes.

4 cups flour
1 1/2 cups sugar (granulated sugar) place in food processor and make super fine
2 1/2 cups ricotta cheese
2 sticks melted butter (cooled)
2 eggs
3 tsp baking powder
1 tsp vanilla extract
4 tsp lemon extract
juice and zest from about 2 med lemons (4T juice, 2T zest)

Preheat oven 350 set rack in middle of oven

Sift together flour baking powder. Cream eggs and sugar for 2 minutes until pale. Add in melted butter, lemon juice, zest, ricotta, and extracts and finally the flour/baking powder mixture until well mixed on medium. The dough should be smooth and silky. Stop and scrape down the sides then mix on medium for 30 more seconds.

Fill cupcakes 3/4 full and bake 20-25 minutes until tops bounce back when pressed slightly and tester comes out clean. Cool in pans 5 min. Then remove to cooling rack.


Raspberry Buttercream

1 cup butter 
1 cup shortening
4-6 cups powdered sugar 
4T milk (if necessary)
1 cup raspberry pie filling (puree so it’s smooth before adding)
1 tsp Raspberry Extract
Dash of Salt

Cream butter and shortening together for 5 minutes.  Add Raspberry Pie Filling, Raspberry Extract and Salt. Gradually add powdered sugar and milk until you reach your desired piping consistency.


Enhanced by Zemanta

Saturday, September 4, 2010

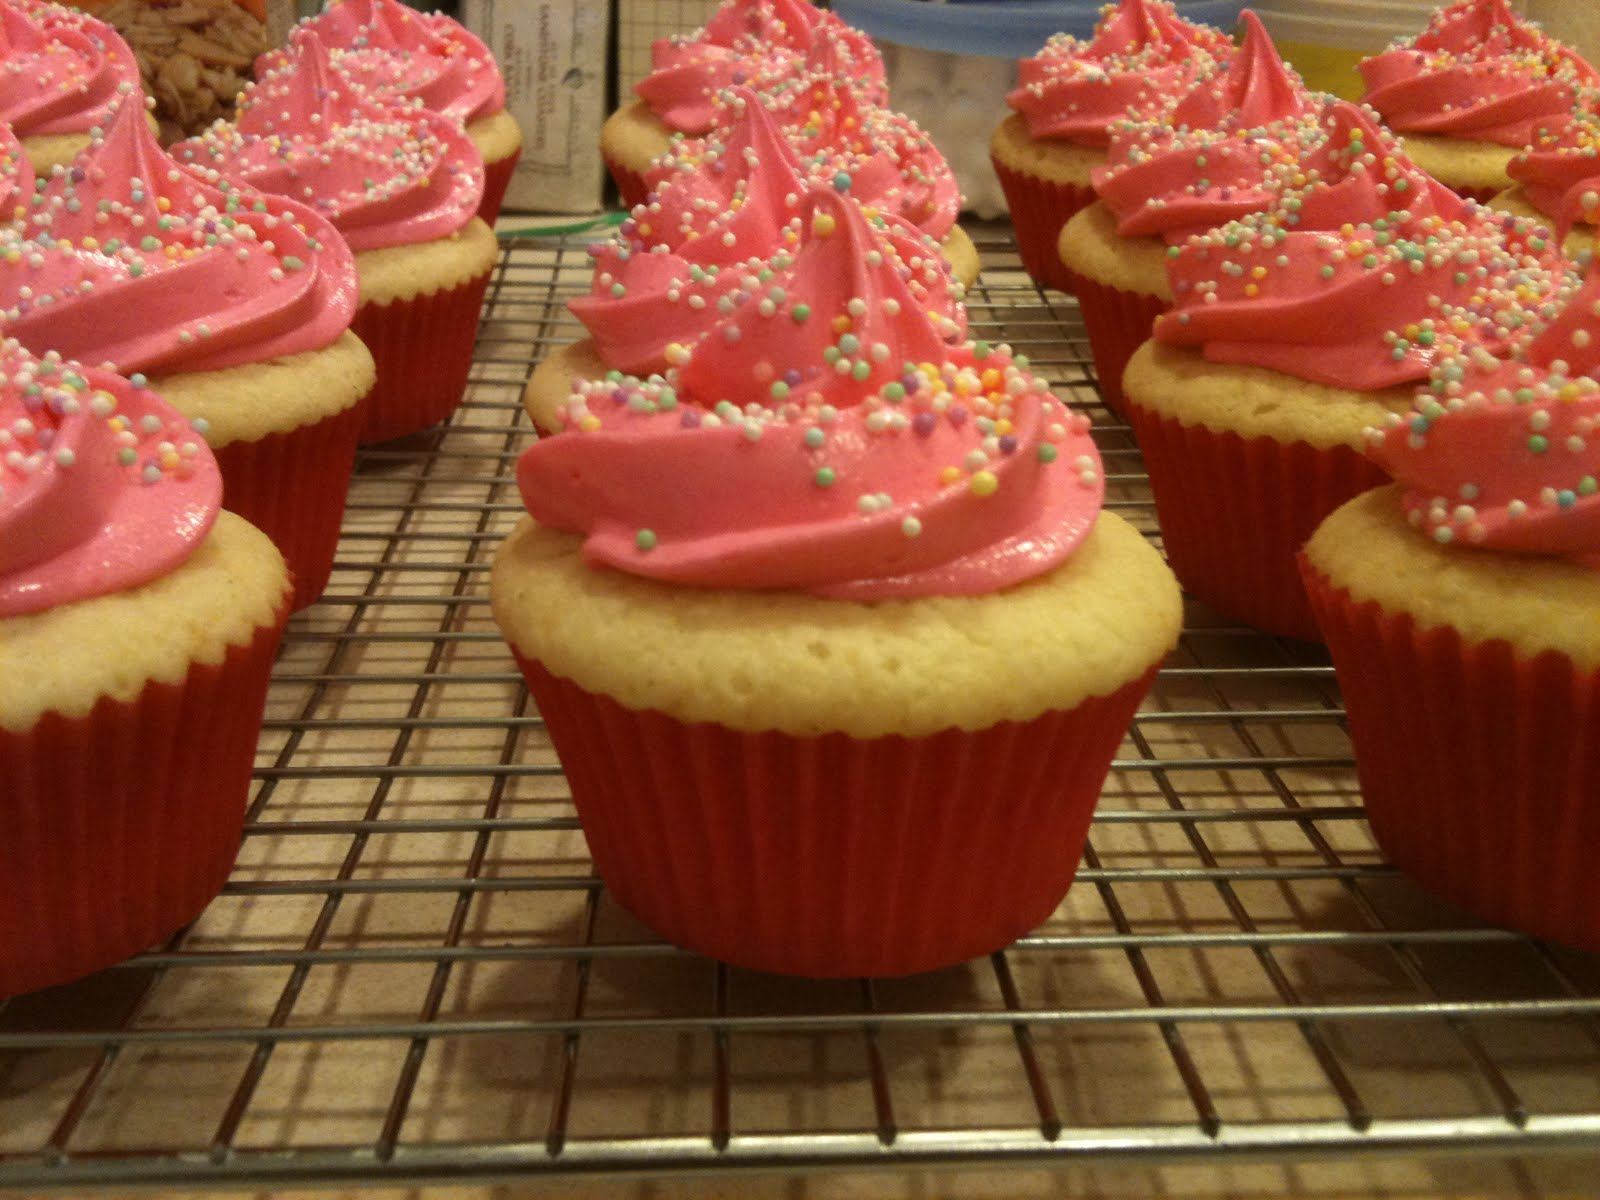
Pink Lemonade Cupcakes with Pink Lemonade Buttercream


Nothing says summer to me more than lemonade, especially pink lemonade.  I have always loved the tartness of lemons and lemonade is the perfect combination of tartness and sweetness in a glass.  What a great flavor to put in a cupcake.  These turned out to have just the right tart / sweet combo I love.


Pink Lemonade Cupcakes
from Confections of a Foodie Bride

1 1/8 cup (9 oz) frozen Pink Lemonade Concentrate, thawed*
White cake mix (yes, the boxed stuff)
3 egg whites
2 Tbsp vegetable oil

* For a less tart cupcake (and these babies do pack a punch), try reducing the amount of pink lemonade. 3/8 cup water and 3/4 cup pink lemonade will cut the tartness.

In a stand mixer, add the cake mix, egg whites, vegetable oil, and the pink lemonade concentrate. Mix on low for about 30 seconds and then increase to medium speed for 90 seconds (the batter will still be a bit lumpy; take care not to overmix so you don’t end up with dry cupcakes).

Spoon the batter into a lined muffin pan (fill the cups between 2/3 and 3/4 full). Bake at 350 for about 25 minutes or until a toothpick registers done in the center cupcake. Remove the pan from the oven and cool 5 minutes. Remove the cupcakes and cool completely on a baking rack.

Once the cupcakes have cooled, make the icing and ice the cupcakes.


Pink Lemonade Buttercream

3 cups + 3 Tbsp confectioners sugar
1 stick unsalted butter at room temperature
1/8 tsp salt
2 Tbsp lemon juice
Red food color (to color icing and sugar, optional)
1/4 cup granulated sugar (optional)

Add the butter, confectioners sugar, salt, lemon juice, and food coloring (if using) to the stand mixer and mix on low using the paddle attachment until combined. Turn the speed to med-high until the icing is fluffy and uniformly pink. Add the icing to a pastry bag fitted with your favorite tip and ice the cupcakes.

Optional – Add the sugar and a couple drops of the food coloring to a food processor. Process until the sugar turns pink. Spread the sugar onto a plate and let dry for 15 minutes. Sprinkle onto freshly-iced cupcakes.

Source: Adapted from Wilton


Sunday, August 29, 2010

Zucchini Spice Cupcakes with Caramel Frosting

As summer comes to a close in Utah, backyard gardens are full of summers bounty.  It seems like every home gardener plants at least one zucchini plant.  And as we all know, one plant yields plenty of zucchinis.  It seems every where you turn family, friends and neighbors are begging you to take some zucchini off their hands.  I've never been a fan of zucchini until I found this wonderful recipe for Zucchini Spice Cupcakes with Caramel Frosting.  The contrast of the spice in the cake and sweetness of the caramel frosting is a perfect combination.

Zucchini Spice Cupcakes with Carmel Frosting
from Taste of Home Magazine

Preheat Oven to 350 degrees F
Makes 18 to 24 cupcakes
  
Ingredients
3 eggs
1-1/3 cups sugar
1/2 cup canola oil
1/2 cup orange juice
1 teaspoon almond extract
2-1/2 cups all-purpose flour
2 teaspoons ground cinnamon
2 teaspoons baking powder
1 teaspoon baking soda
1 teaspoon salt
1/2 teaspoon ground cloves
1-1/2 cups shredded zucchini


CARAMEL FROSTING:
1 cup packed brown sugar
1/2 cup butter
1/4 cup 2% milk
1 teaspoon vanilla extract
1-1/2 to 2 cups confectioners' sugar

Directions

In a large bowl, beat the eggs, sugar, oil, orange juice and extract. Combine dry ingredients; gradually add to egg mixture and mix well. Stir in zucchini.

Fill paper-lined muffin cups two-thirds full. Bake at 350° for 20-25 minutes or until toothpick inserted near the center comes out clean. Cool for 10 minutes before removing to a wire rack.


For frosting, combine the brown sugar, butter and milk in a saucepan. Bring to a boil over medium heat; cook and stir for 2 minutes or until thickened. Remove from the heat; stir in vanilla. Cool to lukewarm.

Gradually beat in confectioners' sugar until frosting reaches spreading consistency. (You may need to add more confectioners' sugar to reach desired consistency.)  Frost cupcakes. Yield: 1-1/2 to 2 dozen.
Enjoy summer's bounty and make these cupcakes!

Thursday, August 26, 2010

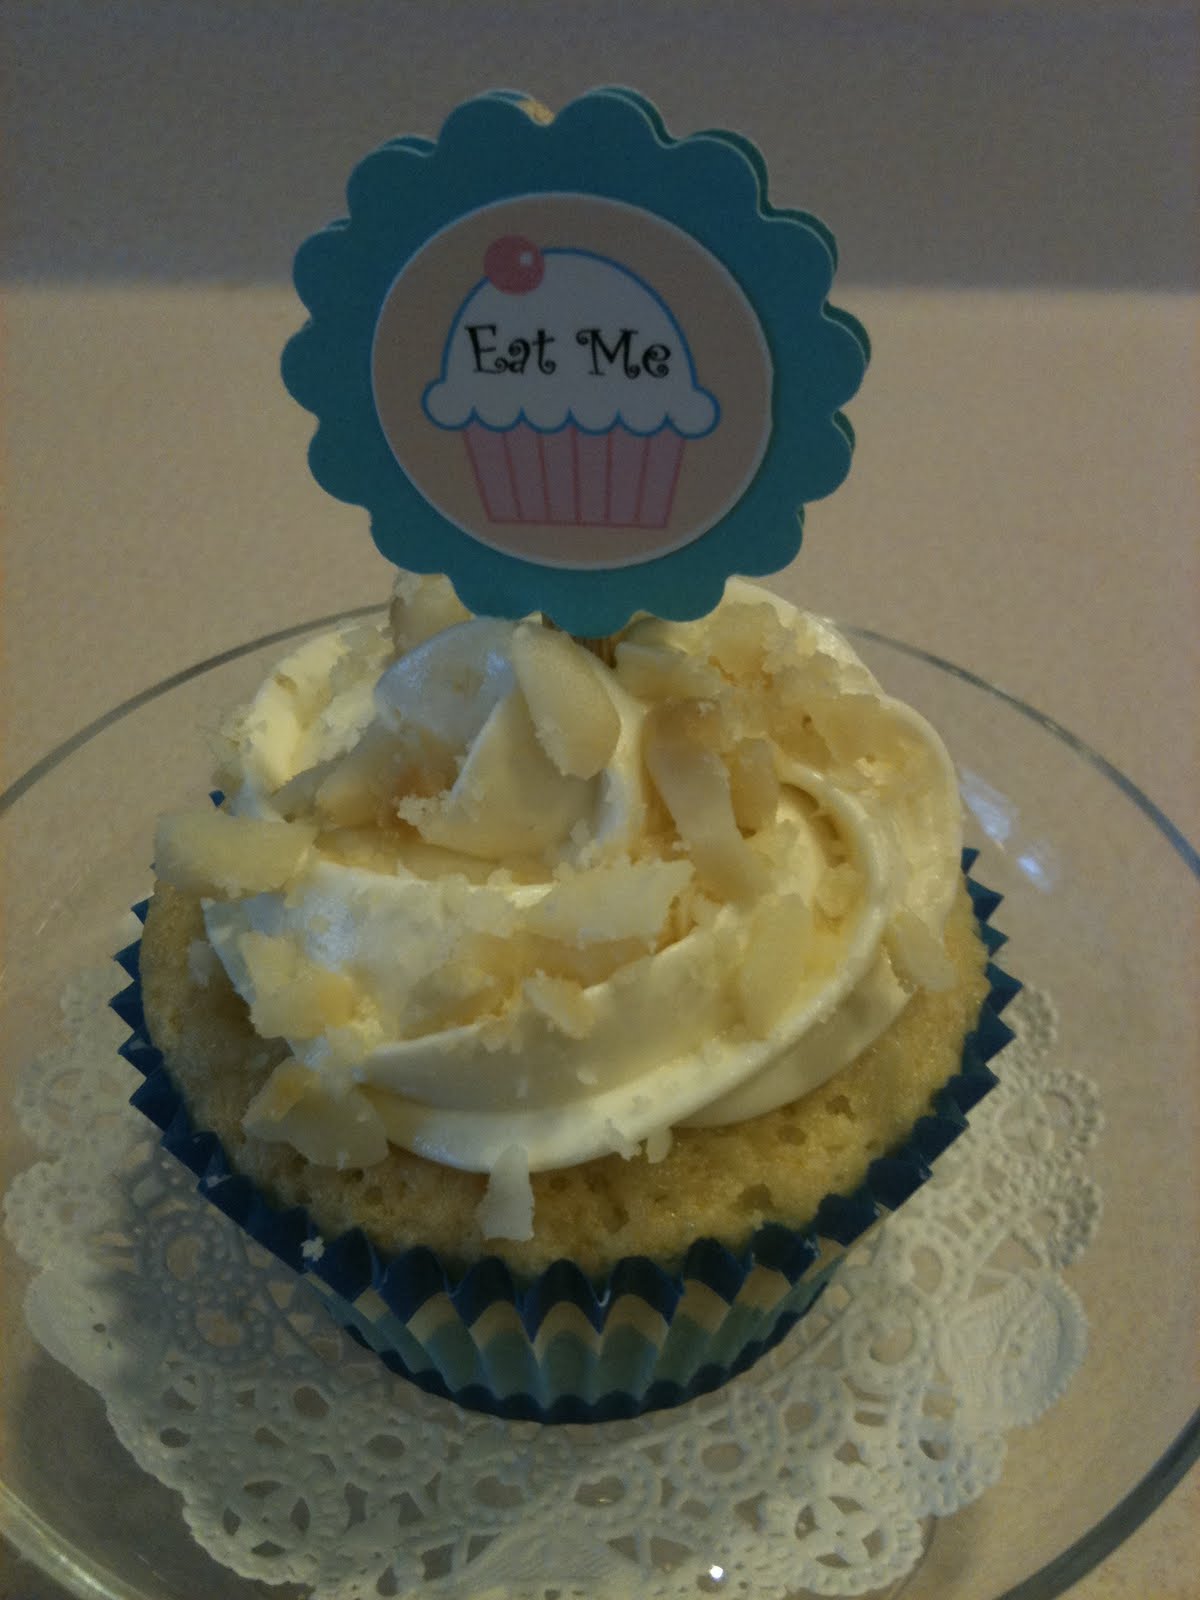
White Chocolate Macadamia Nut Cupcakes with White Chocolate Buttercream

White Chocolate Chips

I have to admit that I am a big fan of white chocolate.  I know it's technically not chocolate but I love the smooth creamy flavor.  Especially mixed with nuts.  When I lived in New York City, there was a wonderful little candy shop in the West Village on Christopher Street that sold bars of white chocolate studded with cashews.  I would make a special trip there every couple of weeks to indulge my sweet tooth.  Then Mrs. Field's came out with the White Chocolate Macadamia Nut Cookie and I was hooked.  
Macadamia Nuts
When I started baking cupcakes I knew this was a combination I had to have in a cupcake.  I think I have found the perfect combination of cupcake and buttercream.  I hope you enjoy them as much as I do.  It's in my top ten of favorite cupcakes.  I have to eat one right out of the oven and then one right after I frost them.  I have to use all my will power not to eat the entire batch right then and there.

White Chocolate Macadamia Cupcakes
from 125 Best Cupcake Recipes by Julie Hasson

Preheat oven to 350 degrees F
Makes 24 Cupcakes

INGREDIENTS:
3 cups all purpose flour
1 1/2 cups macadamia nuts, coarsely chopped
3 tsp baking powder
1/2 tsp salt
2 cups granulated sugar
1 cup canola oil
4 eggs
2/3 cup milk
1 cup white chocolate chips

DIRECTIONS:
In a small bowl, mix together flour, macadamia nuts, baking powder and salt.

In a large bowl, whisk together sugar, oil and eggs until smooth.  Alternately beat in flour mixture and milk, making three additions of flour mixture and two of milk, beating just until smooth.  Stir in white chocolate chips.

Scoop batter into prepared pan.  Bake in preheated oven for 20 to 24 minutes or until golden brown and tops of cupcakes spring back when lightly touched.  Let cool in pan on rack for 10 minutes.  Remove from pan and let cool completely on rack.  Top cupcakes with White Chocolate Buttercream and garnish with chopped Macadamia Nuts.

White Chocolate Buttercream
adapted from Billy's Chocolate Buttercream
INGREDIENTS:
1 lb. (4 sticks) butter
12 ounces white chocolate chips
3 cups confectioners' sugar
1/4 cup whole milk
1 teaspoon pure vanilla extract

DIRECTIONS:
Cream (with hand or stand mixer)  butter until light and fluffy for5 minutes (do not under beat - use a timer)

Melt (in microwave or double boiler):  12 ounces white chocolate chips

Set aside and allow to cool for approximately 20 minutes. Make sure chocolate is cool to the touch, you don’t want it to melt your butter.  After chocolate has cooled, add it to the creamed butter and mix on low speed until just combined. Scrape sides of bowl then …

Add:
2-3/4 cups confectioners' sugar
1/4 cup whole milk
1 teaspoon pure vanilla extract

On low speed of a hand or stand mixer, mix until fully incorporated; no confectioners' sugar should be visible. Mixture should be smooth and fluffy.

Do not refrigerate; use immediately or store in airtight container for up to 2 days.


Enjoy!

Monday, August 23, 2010

Maple French Toast and Bacon Cupcakes - Breakfast in a Cupcake!

What is it with men and bacon?  As soon as word got around work that I was baking cupcakes weekly and bringing them to work, one of the guys in the office began begging me to make a bacon cupcake.  And though I had been reading about and seeing pictures of bacon cupcakes all over cyberspace this flavor was not on the top of my list. But he and another male co-worker kept bugging me and I kept resisting.

This went on for almost six months until finally he announced that he had given his two week notice and all he wanted for a going away present was some Bacon Cupcakes.  What was I to do but make them for him.  Back to the web to find a recipe.  I finally decided on a recipe from the Food Network Magazine that won their Maple Syrup secret ingredient challenge.  I have to admit they were really good.  It was breakfast in a cupcake.  He was very happy to finally have his bacon cupcake. 

Maple French Toast and Bacon Cupcakes with Maple Cream Cheese Frosting
by Kara Scow

Ingredients

For the Cupcakes:
1 cup all-purpose flour
1 cup cake flour
1 3.9-ounce box instant vanilla pudding mix
1 teaspoon baking powder
1 tablespoon potato starch
1 teaspoon cinnamon
1 teaspoon freshly grated nutmeg
1/2 teaspoon salt
1 stick unsalted butter, at room temperature
1/4 cup packed light brown sugar
1/4 cup granulated sugar
1 1/2 teaspoons vanilla extract
4 large egg whites, at room temperature
1/4 cup maple syrup
1/2 cup half-and-half, at room temperature
1/2 cup chopped cooked bacon (5 strips)

For the Frosting:
1 8-ounce package cream cheese, at room temperature
2 tablespoons unsalted butter, at room temperature
2 cups sifted confectioners' sugar
1/4 cup maple syrup
2 teaspoons ground cinnamon
3 strips bacon, cooked and chopped (optional)


Directions for Cupcakes:  Preheat the oven to 325 degrees. Place paper liners in a 12-cup muffin tin. Prepare the cupcakes: Combine the flours, pudding mix, baking powder, potato starch, cinnamon, nutmeg and salt in a bowl with a whisk.

In a separate bowl, cream the butter and sugars with a mixer on low speed until combined, 6 to 8 minutes. Gradually mix in the vanilla and egg whites. Scrape down the sides of the bowl; continue mixing until light and fluffy. Add the flour mixture in 3 batches, alternating with the maple syrup and half-and-half, mixing after each addition and ending with flour. Mix until the ingredients are just combined; do not overmix. Fold in the bacon.

Pour the batter into the prepared muffin tin, filling each cup about three-quarters of the way. Bake until a toothpick inserted in the center comes out clean, about 40 minutes. Cool completely.

Directions for Frosting:  Beat the cream cheese and butter with a mixer on medium speed until creamy. Add the confectioners' sugar, maple syrup and cinnamon; beat until combined. Spread on the cooled cupcakes; top with chopped bacon, if desired.


Enhanced by Zemanta

Sunday, August 1, 2010

Snickers Cupcakes - The Marriage of a Cupcake and a Candy Bar

Snickers Candy Bar

Snickers candy bars have been mine and my Mother's favorite candy bar since I can't even remember.  It's that perfect combination of chocolate, caramel, nougat and peanuts.  So I thought...What could be better than a Snickers Cupcake?  I have had the idea for a Snickers Cupcake in my mind for months.  Then last week Snickers Cupcakes appeared on one of my favorite blogs.  Someone had beat me to it and the photos made me want one of those cupcakes immediately.  I could hardly wait to try out this recipe.

The recipe comes from Jamie over at My Baking Addiction.  She makes gorgeous cupcakes and lots of other delicious foods. Not to mention her photos are good enough to eat.  They make you want to try every recipe she posts.


Snickers Cupcakes
By Jamie from My Baking Addiction
Makes 24-30 cupcakes

For the cake:
1 (18.25 ounce) package devil’s food cake mix
1 (5.9 ounce) package instant chocolate pudding mix
1 cup sour cream
1 cup vegetable oil
4 eggs; lightly beaten
½ cup warm water
1 teaspoon of vanilla
24-30 frozen Snickers Miniatures

Directions:
1. Preheat oven to 350 degrees F.
2. Line (2) 12 cup muffin tins with paper liners.
3. In a large bowl, mix together the cake and pudding mixes, sour cream, oil, beaten eggs, vanilla and water.
4. Using an ice cream scoop fill cupcake liners half full.
5. Gently push a frozen Snickers Miniature bar into the center of the batter and smooth the surface making sure to cover the candy bar with batter.
6. Bake for 18-22 minutes, or until top is springy to the touch and a wooden toothpick inserted comes out clean.
7. Cool cupcakes thoroughly on wire rack.


For the frosting:
2 sticks unsalted butter; room temperature
½ cup shortening
2 teaspoons pure vanilla extract
1 ½ pounds confectioners’ sugar
1/3 cup caramel topping; plus more for drizzling
1/4 teaspoon salt

Directions:
1. Cream the butter and shortening in the bowl of an electric or stand mixer. Add the vanilla extract, salt and caramel syrup and combine well.
2. Begin adding in the sugar and mixing thoroughly after each addition. After all of the sugar has been added and mixed thoroughly, give it a taste and decide if you want to add in more caramel syrup. For thicker frosting you can gradually add in a little more sugar.

Garnish with chopped Snickers bars and a drizzle of caramel syrup
.
If you prefer not starting with a cake mix just use your favorite Devils Food Cupcake recipe for the cupcake batter.

These are very rich cupcakes.  Be prepared with a tall glass of ice cold milk.  You may also want to eat them on a dessert plate with a fork and savor every bite.  Enjoy!


Saturday, July 31, 2010

Orange Creamsicle Cupcakes - Summertime in a Cupcake

It has been very hot here in Utah this July but as we like to say..."It's a dry heat".  A total blessing.  My years in NYC taught me about the pains and pleasures of a humid climate.  Summer always reminds me of one of my favorite childhood treats - the Creamsicle Popsicle.

You know, delicious vanilla ice cream surrounded by orange popsicle.  So good!  What if you could have all that yumminess in a cupcake?  It would be amazing and delicious.  I had to try and create an Orange Creamsicle Cupcake.  What I came up with is Orange Cake filled with Vanilla Cream topped with a swirl of Vanilla Buttercream sprinkled with Orange Kreme Krunch and crowned with an Orange Slice.  I must say they were very tasty.

 Here are the recipes...

Orange Creamsicle Cupcakes
Makes 18-24 Cupcakes

Ingredients:
1/2 cup (1 stick) unsalted butter, softened
1 cup sugar
2 cups all purpose flour
2 teaspoons baking powder
1/2 teaspoon baking soda
1/2 teaspoon salt
3/4 cup orange juice concentrate
3/4 cup buttermilk
3 eggs
3 oranges, zest only
1 tablespoon orange oil (optional)

Directions:
1.  Preheat oven to 350 degrees F and line a cupcake pan with cupcake papers
2.  Cream the butter and sugar together in a mixer until it turns pale and fluffy, approximately 5 minutes
3.  In a medium sized mixing bowl, sift together the flour, baking powder, baking soda and salt and set aside.
4.  In another bowl, mix together the orange juice concentrate, buttermilk, orange zest and optional orange oil and set aside.
5.  With the mixer running, drop the eggs one by one into the creamed butter.
6.  Add half the dry ingredients followed by half the wet ingredients, allowing each addition to get incorporated before adding the next.  Repeat with the rest of the dry and wet ingredients.
7.  Fill the cupcake papers 2/3 full and bake at 350 degrees for 15-18 minutes or until the middle springs back to the touch and the edges are light, golden brown.  Remove from the oven and cool in the pan for 10 minutes.
8.  Remove from the pan and allow to cool on a rack completely while you make the filling.

Using an orange zester to zest an orange.Image via Wikipedia

Vanilla Cream Cupcake Filling
This cream filling is almost as good as the filling for Hostess Cupcakes. Also works well in a chocolate jelly roll cake.

Makes enough for 24 cupcakes or 1 jelly roll cake.

Ingredients:
1/2 cup margarine (or butter)
1/2 cup Crisco or soft shortening (not butter flavored)
1 cup sugar
3 tablespoons flour
2/3 cup milk
1 teaspoon vanilla

Directions:
1.  Cream margarine and Crisco until light and fluffy.
2.  Add sugar, flour, then milk and vanilla.
3.  Whip until sugar is all dissolved and mixture is thick and fluffy.
4.  Put in pastry bag or icing tube.
5.  Insert into cooled cupcakes.
6.  Top with your favorite frosting.


Vanilla Decorator's Buttercream

Ingredients:
1 cup (2 sticks) unsalted butter
1 cup Crisco shortening (not butter flavored)
6-8 cups powdered sugar
1/4 cup of milk
Pinch of salt
2 teaspoons vanilla

Optional Decorations
Orange Kreme Krunch
Gumdrop Orange Slices

Directions:
1.  Cream together butter and Crisco until light and fluffy, approximately 5 minutes.
2.  Gradually add 4 cups of powdered sugar.
3.  Add milk, salt and vanilla.
4.  Continue adding powdered sugar until frosting is of piping consistency.
5.  Fill piping bag with frosting and pipe frosting swirls onto cupcakes.
6.  Sprinkle with Orange Kreme Krunch and top with a gumdrop Orange Slice.

Enhanced by Zemanta
These cupcakes are the perfect retro treat with an iconic marriage of creamy vanilla and tangy orange.  Once in the oven, these little cakes emit a powerful orange aroma.  And when filled with vanilla cream and topped with vanilla buttercream, family, friends and neighbors will polish them off in no time.

Sunday, July 18, 2010

Chocolate Cupcakes from Billy's Bakery in NYC

Billy's Bakery on Franklin Street in Tribeca

Being cupcake obsessed has it's special problems in NYC.  There are so many wonderful bakeries offering delicious cupcakes in amazing flavors of cake and frosting.  My absolute favorite NYC cupcake bakery is Billy's Bakery.  These cupcakes take me back to the cupcakes of my childhood.  Especially his Chocolate Cupcake with Chocolate Buttercream.  Pure yumminess.

Billy's Chocolate Cupcakes

All of their flavors are delicious but there is something about the chocolate ones that take me right back to the chocolate cupcakes my Mom made.  Luckily I tracked down Billy's recipe for both the cupcake and the decadent buttercream and these have been my go to chocolate cupcakes ever since.


Billy’s Chocolate Cupcakes
by Billy Reece
Yields 24 to 27 cupcakes

INGREDIENTS
2 sticks unsalted butter (8 ounces)
1 cup granulated sugar (7 ounces)
1 cup light brown sugar (7-3/4 ounces)
4 large eggs (one at a time)
6 ounces unsweetened chocolate
2 cups cake flour (9-1/4 ounces)
1 teaspoon baking soda
1 cup buttermilk (room temperature)
1 teaspoon pure vanilla extract

DIRECTIONS
Note: In this recipe, measurements for dry ingredients are given both by volume (cups) and by weight (ounces). Professional chefs tend to use weight measures, while home cooks usually use volume.

Cream:
2 sticks unsalted butter (8 ounces)
1 cup granulated sugar (7 ounces)
1 cup light brown sugar (7-3/4 ounces)

Add:
4 large eggs (one at a time)
6 ounces unsweetened chocolate (chocolate should be melted, then cooled for approximately 15 minutes before being added).

Add and alternate:
2 cups cake flour (9 1/4 ounces)
1 teaspoon baking soda

With:
1 cup buttermilk (room temperature)
1 teaspoon pure vanilla extract

Place cupcake paper into each cup of 2 muffin pans (each pan yielding 12 muffins). Then fill each cup with 1 leveled off scoop of an ice cream scooper.

Bake at 350 degrees in regular oven for 20 to 25 minutes or until tester comes out clean.

Buttercream Using Mint Chips instead of Semi-Sweet Chocolate

Simple Chocolate Buttercream
by Billy Reece

INGREDIENTS
4 sticks butter
12 ounces semisweet chocolate
2 3/4 cups confectioners' sugar
1/4 cup whole milk
1 teaspoon pure vanilla extract

DIRECTIONS
Cream (with hand or stand mixer):
4 sticks butter (16 ounces) until light and fluffy, approximately 5 minutes

Melt (in microwave or double boiler):
12 ounces semisweet chocolate
Set aside and allow to cool for approximately 20 minutes. After chocolate has cooled, add it to the creamed butter and mix on low speed until just combined. Scrape sides of bowl then …

Add:
2 3/4 cups confectioners' sugar
1/4 cup whole milk
1 teaspoon pure vanilla extract

On low speed of a hand or stand mixer, mix until fully incorporated; no confectioners' sugar should be visible. Mixture should be smooth and medium brown in color.

Do not refrigerate; use immediately or store in airtight container for up to 2 days.

This Buttercream is absolutely delicious.  Be adventurous and substitute other flavors of baking chips to make this frosting.

Buttercream Using White Chocolate Chips instead of Semi-Sweet Chocolate


Enhanced by Zemanta

Wednesday, July 14, 2010

Vanilla Cupcakes - Magnolia Bakery's Best Selling Cupcake

These are the cupcakes that supposedly started the whole "Cupcake Craze" by appearing on Sex And The City.  When I go to NYC and visit any one of the numerous Magnolia Bakeries, I always have their Vanilla Cupcake with Vanilla Buttercream.  They have a wonderful Vanilla flavor and the tops get kind of crusty like a sugar cookie. I knew I had to duplicate them, so I bought the cookbook, More From Magnolia: Recipes from the World Famous Bakery.  These are now my favorite vanilla cupcakes to make from scratch and they are the perfect base for any of my yummy frosting recipes.

A note about self rising flour:  if you are baking in high altitude (above 3,000 feet) do not use self rising flour.  Self rising flour already contains baking powder and salt so there is no way to adjust the amount of baking powder you put in the recipe.  To replace self rising flour in any recipe use this formula: replace each cup of self rising flour with a cup of all-purpose flour, 1 1/2 teaspoons of baking powder and 1/2 teaspoon of salt. I learned this the hard way with this recipe.  The first batch I made overflowed their baking cases and then fell and sunk in on themselves.  Still tasty but not very attractive.


Magnolia Bakery Vanilla Cupcakes
Servings:  24

Ingredients:

1 ½ cups self-rising flour (see the note above about self rising flour)
1 1/4 cups all-purpose flour
1 cup unsalted butter, softened
2 cups sugar
4 large eggs, at room temperature
1 cup milk
1 teaspoon vanilla extract

Directions:

Prep Time: 30 minutes / Total Time: 55 minutes / Line 24 muffin tins with cupcake papers.

In a small bowl, add the flours; stir to combine; set aside.

In a large mixing bowl, cream the butter using an electric mixer on medium speed until smooth.  Add the sugar gradually and beat for 3 minutes or until fluffy.  Add the eggs, one at a time, beating well after each addition.

Add the dry ingredients in three parts, alternating with the milk and vanilla.  With each addition, beat until the ingredients are incorporated but do not over mix.

Spoon the batter into the cupcake liners, filling about 3/4 full.  Bake in a 350° oven for 20-25 minutes.  Cool the cupcakes in the tin for 10 minutes.  Remove cakes from the tins and cool on a wire rack before icing.  Ice with your favorite Buttercream.

Sunday, July 11, 2010

The Deliciousness that is Swiss Meringue Buttercream


I don't know why I am afraid of some recipes.  After all I am the daughter of a Home Economics teacher who is an amazing cook and baker.  I grew up watching her make delicious desserts using all kinds of techniques.  Why then was I afraid of making Swiss Meringue Buttercream? Simply because you had to cook the egg whites and sugar and then whip into a meringue before adding the butter?  No more!  I was going to tackle this recipe and make it mine!

Vanilla Swiss Meringue Buttercream

Ingredients:
5 large egg whites
1 cup plus 2 tablespoons sugar
Pinch of salt
1 lb. (4 sticks) unsalted butter, at room temperature
2 teaspoons vanilla extract

Directions:
To make the frosting, combine the egg whites, sugar and salt in a heatproof bowl (I used the bowl of my Kitchenaid mixer) set over a pot of simmering water.  Heat, whisking frequently, until the mixture reaches 160 degrees F and the sugar has dissolved.  (A candy thermometer is crucial anytime you are cooking sugar.)

Transfer the mixture to the bowl of a stand mixer fitted with the whisk attachment (using the bowl of your mixer makes this step a breeze).  Beat on medium-high speed until stiff peaks form and the mixture has cooled to room temperature, about 8 minutes.

Reduce the speed to medium and add the butter, 2 tablespoons at a time, adding more once each addition has been incorporated.  If the frosting looks soupy or curdled, continue to beat on medium-high speed until thick and smooth again, about 3-5 minutes more (don't worry, it will come together!).  Stir in the vanilla extract and mix until incorporated.  Tint with paste icing color as desired.

Yield: about 5 cups

More photos of these beauties in my Flickr stream

To get my courage up to attempt this recipe I watched the video below on You Tube to see exactly what the steps were in creating this wonderful frosting.  I used the recipe above but I followed her steps.  This Buttercream is light and silky and a dream to pipe onto cupcakes!  This first batch I piped onto some Magnolia Bakery Vanilla Cupcakes and they were divine in their vanilla deliciousness.  I took them to work and they were devoured by 10:30 am.  I can't wait to make different flavors to adorn all my cupcake creations.

Baking at High Altitude - New Challenges

 Photo courtesy of Cake Spy

Growing up in Sacramento, California I learned to bake at an altitude of 25 feet above sea level.  My next baking adventures took place during the 13 years I lived in New York City, New York.  Only 6 feet above sea level.  Baking in Centerville, Utah at just under 5,000 feet above sea level presents an entire new set of challenges in making sure my cupcakes and other baked goods turn out perfect every time. There's nothing worse than spending time and money on a yummy batch of cupcakes to take them out of the oven and they have either overflowed their cases or fallen into a sunken mess.

When I first started baking cupcakes seriously last summer I took a "Cupcakes and Cake Bites Class" at the Viking Cooking School in Salt Lake City.  The most valuable information I took away from this class was this - when baking in this altitude all you need to do is cut the leavening in your recipe by half.  What that means is if the recipe calls for 1 teaspoon of Baking Soda, add 1/2 teaspoon.  If the recipe calls for 1 1/2 teaspoons of Baking Powder, add 3/4 teaspoon.  This was an incredibly easy fix and since doing this I have yet to have any cupcake baking disasters.

Because not everyone who will read this Blog will live in a high altitude I always post the original recipes I use.  No recipes posted here have been adjusted for high altitude baking.  I leave that up to you.

I also found this very helpful article regarding high altitude baking on Allrecipes.com.  Understanding that baking is actually chemical reactions of the ingredients helps understand the importance of following recipes exactly as written.

High Altitude Cake Baking
By: Allrecipes.com Staff

Ahh, the joys of mountaintop living. Clean fresh air, snow capped peaks, falling cakes . . .

Why is high elevation a problem when baking?

Lower air pressure at high elevations causes air bubbles trapped in the batter to rise at a faster rate. When this happens, cakes rise very fast and high . . . then fall. As a result, you end up with a dense, dry cake--typically, a change in the proportion of ingredients used in leavened foods is needed.
Occasionally, you may even need to adjust the baking temperature in your oven as well, but this can start a chain reaction of additional problems. When you increase your baking temperature, liquids will evaporate faster and the rest of the ingredients become concentrated. Generally, this means you end up with too much sugar in the batter, which will prevent the cake from setting (i.e. you will be left with a gooey mess).

So, how does one solve these problems?
Cooking at high altitudes generally requires two basic adjustments:
1. An increase in time for boiled foods.
2. A change in the proportions of ingredients used in leavened foods such as cakes and yeast breads. In some instances, a change in baking temperatures may also be necessary.

Most cake recipes need no modification for sea level up to the altitude of 3,000 feet. Above that, it is often necessary to adjust recipes slightly. Usually, a decrease in leavening or sugar (or both) and an increase in liquid are needed. Remember, ingredients such as eggs or butter are considered liquids.

BAKING

For any baked goods that rise (yeast breads, cakes or breads made with baking powder, etc.), it is important to adjust the recipe so that the rapid rise time doesn't make the resulting bread or cake too dry. This can be done as follows:

For yeast cakes:
Yeast cakes rise more quickly at high altitudes, so be sure to watch your dough carefully and judge the rise time by the change in the dough's bulk, not by the amount of time it takes. Proofing time for yeast cakes should be reduced.

For cakes using baking powder:

Don't over beat the eggs. Over beating adds too much air to the cake.

Raise the baking temperature slightly; the faster cooking time will keep the recipe from rising too much. At elevations over 3,500 feet, the oven temperature for batters and doughs should be about 25 degrees F higher than the temperature used at sea level.

Decrease the amount of baking powder slightly; this also prevents the recipe from rising too much.

For foam cakes:

Cakes tend to stick more when they are baked at high altitudes, so be sure to always grease your baking pans well and dust them with flour, or line them with parchment paper. Exceptions are angel food cakes and sponge cakes, which should always be baked in un-greased pans. Also, fill pans only 1/2 full of batter, not the usual 2/3 full, as high altitude cakes may overflow.

Follow the chart below for more specific adjustments. When adapting a recipe for high altitudes, always start out with the smallest adjustment then add more adjustments later and only if necessary. Keep in mind that any or all of these adjustments may be required, for every recipe is different in its balance of ingredients. Only repeated experiments with each different recipe can give the most successful proportions to use. It's a good idea to keep notes of how you adjusted your recipes until you know what works best for your particular location.

GUIDE FOR CAKE BAKING AT HIGH ALTITUDES


Adjustment for 3000 feet:
Reduce baking powder: for each teaspoon decrease 1/8 teaspoon.
Reduce sugar: for each cup, decrease 0 to 1 tablespoon.
Increase liquid: for each cup, add 1 to 2 tablespoons.
Increase oven temperature by 25 degrees F.

Adjustment for 5000 feet:
Reduce baking powder: for each teaspoon, decrease 1/8 to 1/4 teaspoon.
Reduce sugar: for each cup, decrease 0 to 2 tablespoons.
Increase liquid: for each cup, add 2 to 4 tablespoons.
Increase oven temperature by 25 degrees F.

Adjustment for 7000+ feet:
Reduce baking powder: for each teaspoon, decrease 1/4 teaspoon.
Reduce sugar: for each cup, decrease 1 to 3 tablespoons.
Increase liquid: for each cup, add 3 to 4 tablespoons.
Increase oven temperature by 25 degrees F.